I was invited to a wedding in Singapore and the couple didn't want anything as their biggest gift from their friends for them was us coming to Singapore for their special day.
Still I didn't want to come empty-handed, so I came up with the idea of a candy flower bouquet. And here is how I made it:

I bought all kinds of chocolates and candys (about 60 items, all separately wrapped and 2 of each type for the happy couple) and tied sewing thread around one end of their wrapping (about 30 cm per candy using a Cow Hitch knot).

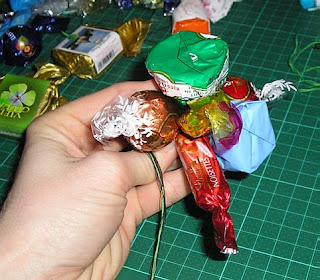
The next step was to arrange 4-6 chocolates into a small bunch and tie them together. I used small pieces of wire which were quite easy to handle, but more thread can be used, too.

Lots of tying...
... and trying not to eat the chocolates myself ;)

Assembling all those small bunches into one large bouquet would have turned them into a big messy bulk, so I cut out a circle from cardboard (the back of a writing pad or any cardboard box that is at hand) and covered it with a green napkin (green paper works as well).

I attached all the small candy bunches to my cardboard circle, leaving a few centimeters between them so there is enough space for all the lovely candy. A large sewing needle works really well here, as one can easily poke holes into the cardboard to pull all the threads that were tied around the candy wrapping in step 1 through the cardboard. I tied several knots to each 2 strands of thread: to the opposite ones, to the neighboring ones etc, to attach the candy really well to the cardboard circle (Don't look at the small holes in the photo! Those were my first attempt to attach them one by one...).
Once all the candy is attached to the cardboard circle, we're almost done!
I used a cheap (green) plastic ice cream cup with a foot (shaped like a champagne glass, but more sturdy, of course) as my bouquet base and put a few cardboard squares on top (not too large so they are not visible).

The finishing touches are Tortenspitze to give it a Biedermeier look and a few fake ivory leaves (a bargain from the swedish furniture store that has been sitting among my diy stuff for a while).
The chocolate hearts are stuck to the bottom of candy like the green one in photo 2 using double-sided tape.
Doesn't look too bad, he?
Now that I am done writing this, I found this website with the same type of candy flower bouquets. They also look nice with one wrapping colour only.
Liked the idea? Create your own candy flower bouquet! It's easy! And maybe share a photo of it?!


